
How to Make Jarvis With Dialogflow and Python
Dialogflow is a powerful chatbot platform developed by Google that allows you to create chatbots without any coding experience. Many companies use Dialogflow to create their own chatbots. As the name suggests, Dialogflow specializes in controlling dialogues. If you want to have specific conversations with your customers about a particular product, service, or topic, then Dialogflow is the perfect tool for you.
Dialogflow uses a common structure for chatbots, with entities, contexts, and variables to create lifelike conversations. It uses INTENTS to try to understand the user’s intent and connect it with the relevant context. Overall, Dialogflow is a versatile and easy-to-use platform that can help you create chatbots that engage with your customers in a natural and effective way.
Jarvis, the virtual assistant from Iron Man, has always been a fascination for people. With the advancements in technology, it is now possible to create a virtual assistant like Jarvis. In this tutorial, we will use Dialogflow and Python to create our own virtual assistant that can understand natural language commands and respond appropriately.
1. Creating a Dialogflow Agent
Dialogflow is a natural language processing (NLP) platform that allows you to build conversational interfaces for your applications. To get started, you need to create a Dialogflow agent. Here are the steps to create a new agent:
Go to the Dialogflow console. Click on the Create Agent button.

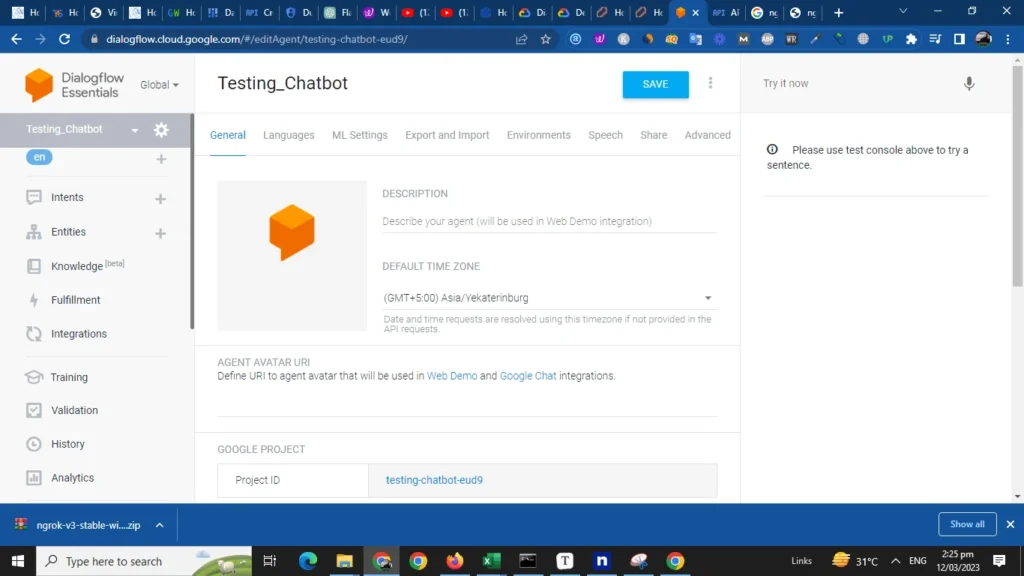
2. Give your agent a name, select the default language, and select the Google project you want to use. Click on the Create button.
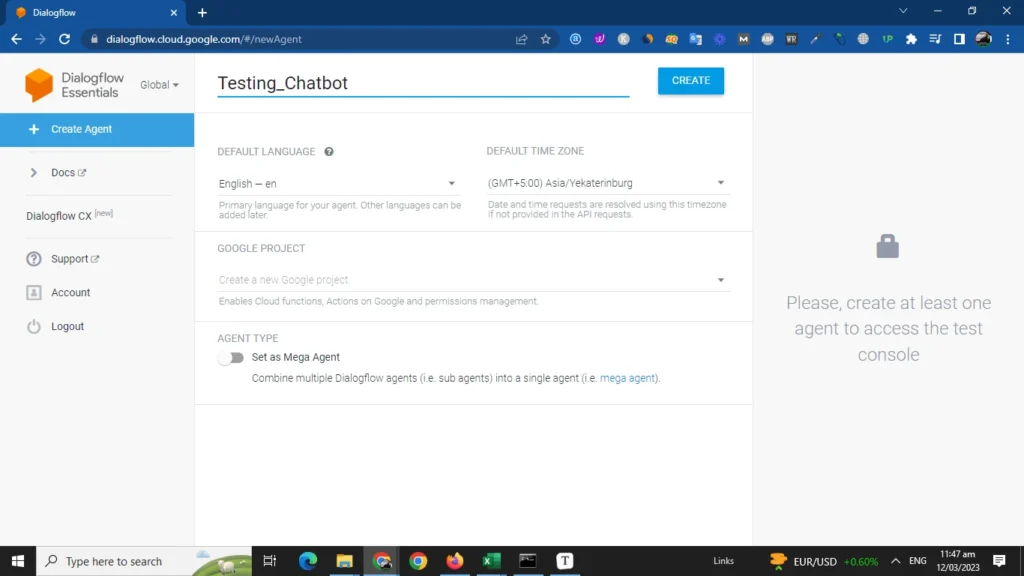
Give your agent a name, select the default language, and select the Google project you want to use. Click on the Create button.
2. Creating Intents
An intent represents an action that your virtual assistant can perform. For example, if the user says What’s the weather like?, the intent would be to get the weather information. Here are the steps to create a new intent:
- In the Dialogflow console, click on the Intents menu item.

2. Click on the Create Intent button.
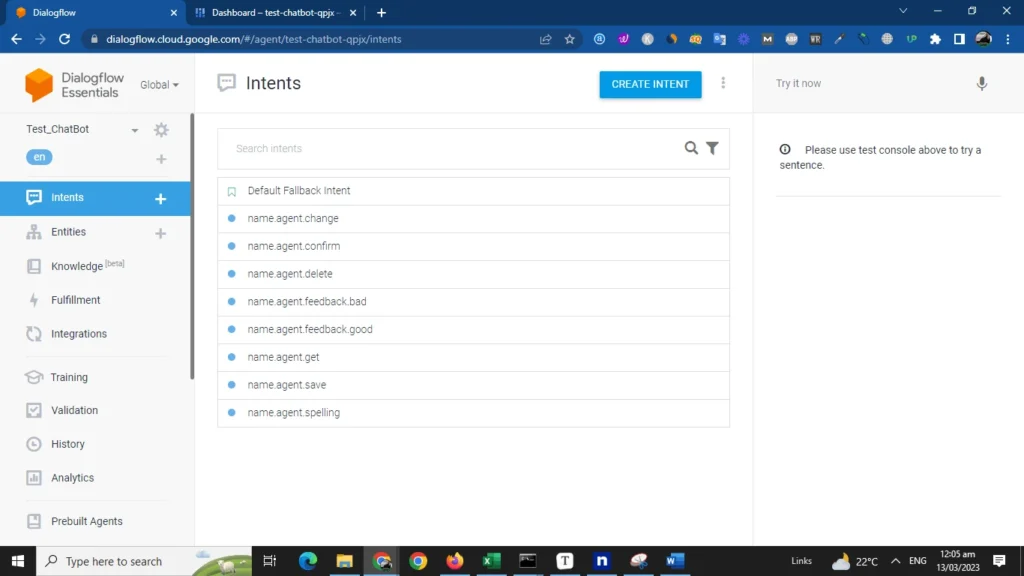
3. Give your intent a name, such as Welcome, and save it.

4. Enter some training phrases that the user might say, such as hi there or heya.

- In the Action and parameters section, you can specify any parameters that the intent needs.
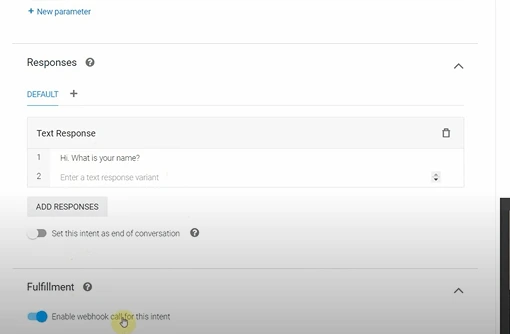
- In the Responses section, enter the response that your virtual assistant should give when this intent is triggered.

Repeat these steps to create more intents for your virtual assistant.
4. In the Fulfillment section, enable the option Enable webhook call for this intent as shown in the picture.
3. Setting Up Authentication
Steps to set up authentication for Dialogflow in your Python code are presented as bullet points:
- Click the Settings gear icon on the left side of the Dialogflow console and Select General from the options.
Scroll down to the Google Project section and Select the project associated with your agent. By clicking this Google Cloud Console will be open.

- On the Google cloud dashboard Click the Go to APIs overview option.

- Now Click on the Enable API button to enable the Dialogflow API (below it’s already enabled).

Go to the Credentials tab. Create a new Service Account key
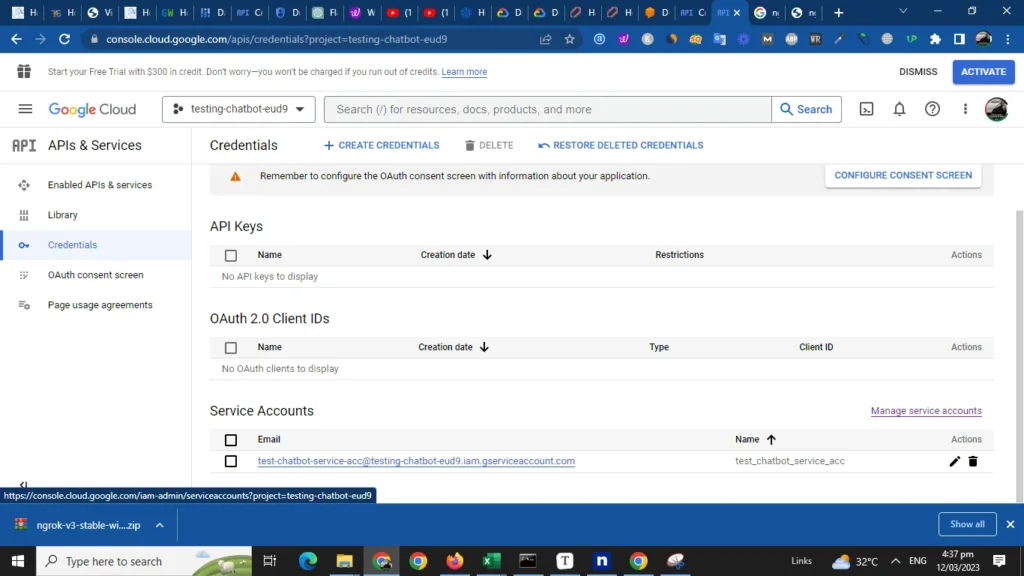
- Download the JSON file containing the service account key. Use the service account key in your Python code to authenticate your API calls
- Use the Dialogflow API to send user input to your agent and receive the corresponding response
4. Integrate the chatbot into the website
We have successfully developed a basic Dialogflow Chatbot. As I do not have a website, I will be utilizing Ngrok to generate a URL for the chatbot.
To use a Ngrok URL in a webhook in Dialogflow, follow these steps:
- Download Ngrok from its official website unzip the folder.
- Install and run Ngrok on your local machine.
- Start a session with Ngrok by running the following command in your terminal or command prompt:
ngrok http <port_number>
Replace <port_number> with the port number on which your webhook server is running. For example, if your webhook server is running on port 5000, you would run:
ngrok http 5000

Ngrok will generate a public URL that is mapped to your local server. Look for the Forwarding section in the Ngrok terminal window and note the HTTPS URL that is displayed as shown below.

In the Dialogflow console, go to the Fulfillment section for your agent.
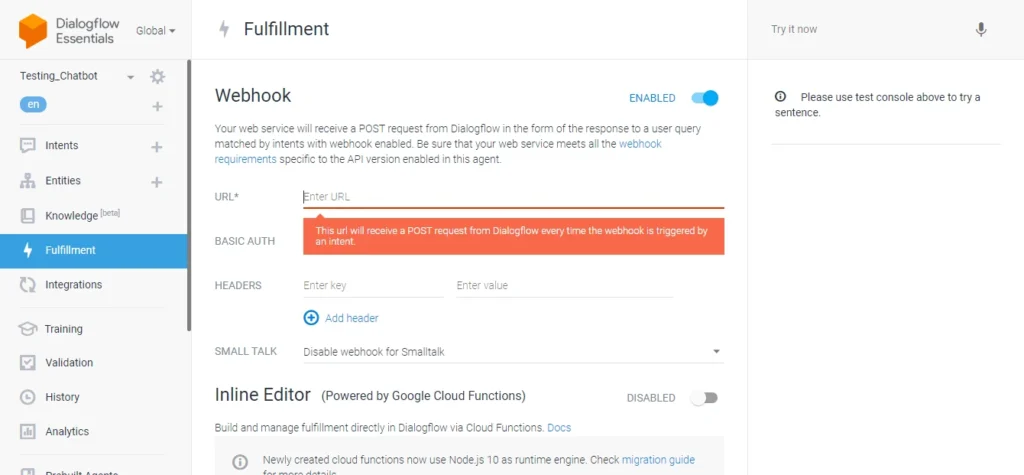
Enable webhook fulfillment by toggling the Webhook switch to the Enabled position.

Note: A webhook is a way for two systems to communicate with each other by sending messages back and forth.
In the context of Dialogflow, a webhook is used to send user input from Dialogflow to a custom backend system, which processes the input and sends a response back to Dialogflow.
- Enter the Ngrok URL as the webhook URL. Use the HTTPS URL that Ngrok generated in step 3, the webhook URL in Dialogflow would be:
https://abcdefg.ngrok.io
- Save the webhook configuration.
Now, when a user interacts with your Dialogflow agent, Dialogflow will send the webhook requests to the Ngrok URL, which will forward them to your local server for processing.
5. Write the Python Code
Dialogflow_Bot.py
from flask import Flask, request, jsonify
app = Flask(__name__)
@app.route('/', methods=['POST'])
def webhook():
if request.method == "POST":
payload= request.json
user_response = (payload['queryResult']['quertText'])
bot_response = (payload['queryResult']['fulfillmentText'])
if user_response or bot_response != "":
print("User: "+ user_response)
print("Bot: "+ bot_response)
return "Message received."
else:
print(request.data)
return "200"
if __name__ == '__main__':
app.run(debug=True, use_reloader=False)
The purpose of this code is to create a webhook for a Dialogflow agent using the Flask web framework. The webhook receives POST requests from Dialogflow with user input and responds with an acknowledgment message.
More specifically, this code does the following:
- Imports the Flask web framework and the necessary modules for handling HTTP requests and JSON data.
- Creates a new Flask application instance.
- Defines a function named webhook that will handle incoming requests.
- Uses a decorator to specify that the webhook function should handle POST requests to the root URL (“/”).
- Parses the incoming JSON payload from the request body using request.json.
- Extracts the user’s input text and the webhook’s response text from the Dialogflow payload using the queryResult field.
- Prints the user’s input and the webhook’s response to the console.
- Returns a message indicating that the request was successfully received.
- If the incoming request is not a POST request, print the request data to the console and returns a HTTP status code 200 to indicate that the request was successfully processed.
- Starts the Flask application in debug mode.
In summary, this code creates a simple webhook that receives POST requests from Dialogflow and prints the user’s input and webhook’s response to the console. This code can be extended to include more complex logic for processing user input and generating webhook responses, depending on the requirements of your Dialogflow agent.
Let’s run this above code:
python Dialogflow_Bot.py
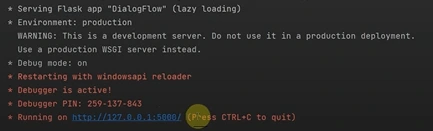
Note: We have Ngrok running, as we typed its URL in dialogue flow and now we are going to run this program.
Let’s type Hi in Dialogflow run it field and see how Chatbot responds:

We can see our chatbot respond Hi, What is your name? in the answer of Hi.
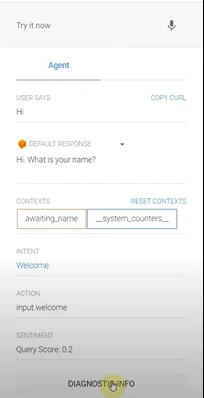
Note: this is the same response we wrote in Intent Response Section above.
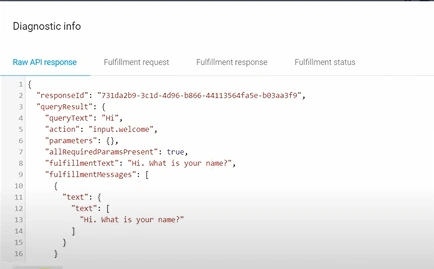
Next, we will click on the diagnostic info option as displayed in the image above. This will allow us to view the raw API response. As we inspect the response, we can see that the value for queryText is Hi, which was input by the user. Additionally, the value for fulfillmentText is Hi, What is your name? which is the response provided by the chatbot.
As we look back at our Python code, we can see that we have called the API using the payload variable and have retrieved the values of the user input and chatbot response from the API response.
Upon running the Python code, we can observe that it is successfully capturing the POST 200 request. The output displayed in the console indicates that the user message and the response of the chatbot have been recorded. This is achieved by extracting the JSON payload from the received request and storing it in the payload variable. The user response and the chatbot response are then assigned to their respective variables within the payload.

By utilizing Flask and Dialogflow, we have successfully established a connection between our chatbot and the user.
Conclusion:
In conclusion, we have created a basic chatbot using Dialogflow and Flask. We have utilized the features of Dialogflow to train our chatbot to understand user input and provide relevant responses. Additionally, we have implemented Flask to receive requests from Dialogflow and extract user input and chatbot responses from the JSON payload.
Overall, this project has provided us with a foundational understanding of chatbot development and the technologies involved in the process. With further exploration and experimentation, we can expand the functionality of our chatbot and create more advanced applications.
Read More:
Fix: Ray Out Of Memory Error Python
Fix – TypeError: tuple indices must be integers or slices not str
How to convert RGB to Hex and Hex to RGB code in Python
How do I reinstall Anaconda Python
Coding Spell | Python Journey | About Us

- How To Find the Length of a List in Python - 16 October 2023
- Python Program to Swap Two Variables - 16 October 2023
- How to Check if a Variable is Null in Python - 14 October 2023